DeskPerk Support Zendesk Read Receipts
In order to track when a customer opens an email, you must add a Read Receipt Pixel to notifications you send from your Zendesk help desk.
NOTE: The Read Receipt Pixel will not work on any Trigger that is sent out when a PRIVATE comment is added or from responses by end users. Please do not add your Read Receipt Pixel to these notifications.
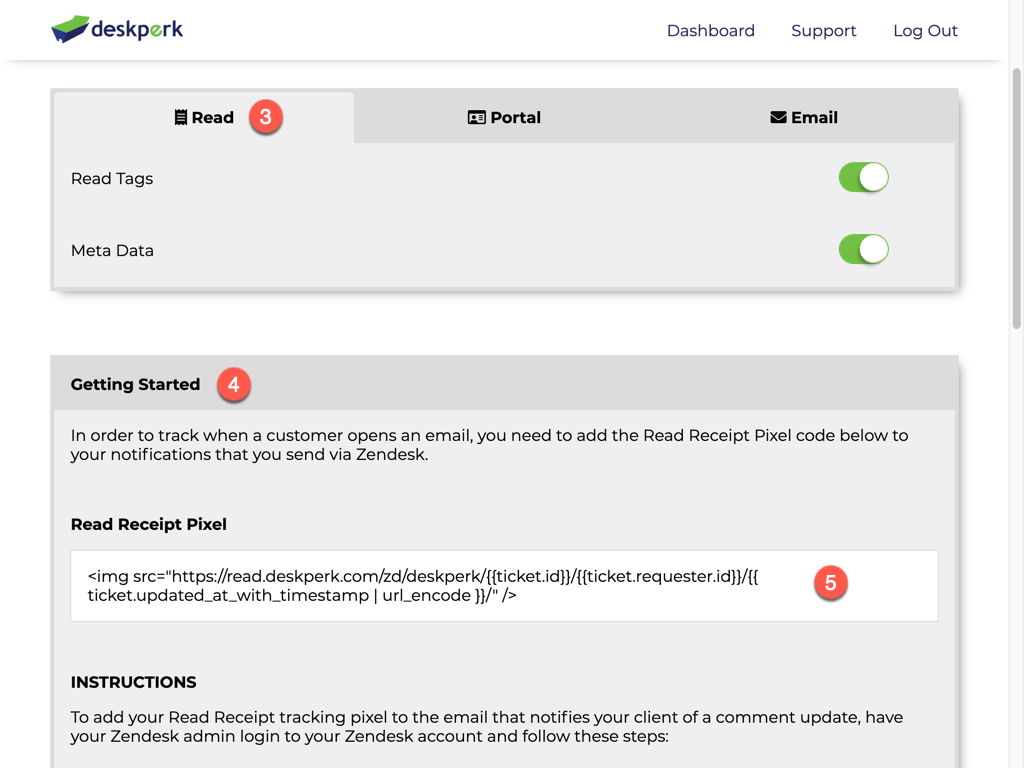
Copy your Read Receipt Pixel
- Login to your DeskPerk Account.
- Click on your help desk's name.
- Click on the Read tab.
- Scroll down to the Getting Started section.
- Copy all the code within the white Read Receipt Pixel box.
Once you have completed the steps above, please continue to the Installation section below to add the Read Receipt Pixel you just copied to your Zendesk emails.
Add to Zendesk Email
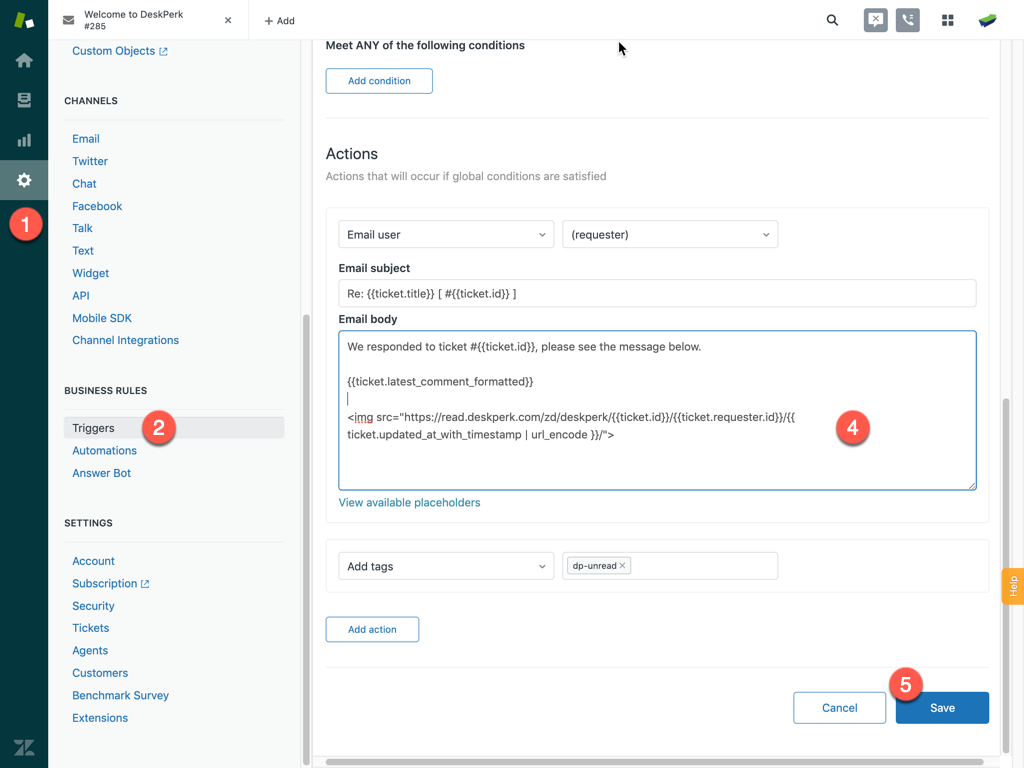
To add your Read Receipt Pixel to the email that notifies your client of a comment update, have your Zendesk admin login to your Zendesk account.
- Click on the Admin icon ( the gear ).
- Click on Triggers under the Business Rules section.
- Click on the Notify Requester of Comment Update (might have a different name) trigger.
- Paste the code you copied from the instructions above, at the VERY BOTTOM of the Email Body.
- Click the Save button.
Repeat these steps on any other Trigger or Automation emails you send through Zendesk.