Zendesk - Add a Column to Views to Display if a Ticket has been Read

DeskPerk Support Zendesk Read Receipts

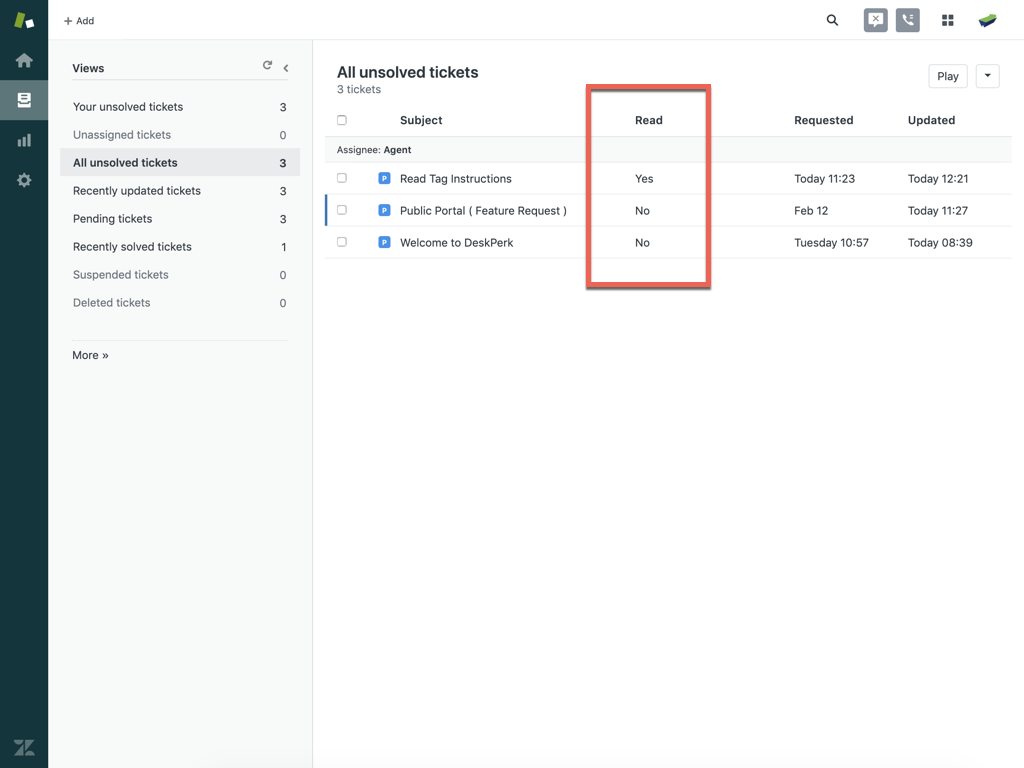
You can easily add a column to your views to indicate if a ticket has been opened.  This makes it extremely easy and fast for agents view Read information without clicking into the ticket.  Please make sure you have followed the directions on our Zendesk - Enable Read Tags article before continuing.

Adding Read Ticket Field

The first thing you need to do is add a new Agent ticket field to your tickets that will be used to display the current Read status.

  1. Click on the Admin icon ( the gear ).
  2. Click on the Ticket Fields link under the Manage section.
  3. Click on the Add Field button.
  4. Select the Checkbox option.
  5. Select the Agent Only permission.
  6. Enter "Read" (without the quotes) in the Title Shown to Agents.  NOTE: This will be the title of your column.  You can set it to whatever you would like, but the rest of this support article will refer to it as the Read column.
  7. Click the Save button.

Add Trigger to Update Read Column to Read

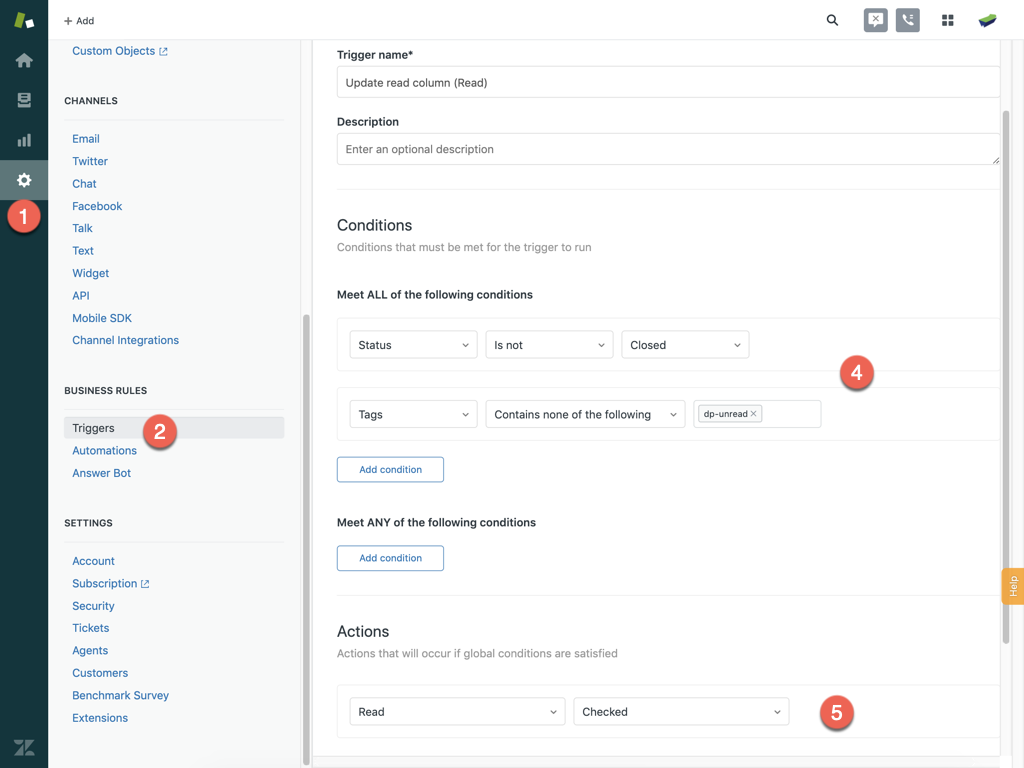
Now that you have the field, you will need to check for the Read status every time the ticket is updated.  Add the following Trigger:

  1. Click on the Admin icon ( the gear ).
  2. Click on Triggers under the Business Rules section.
  3. Click on the Add Trigger button.
  4. Add the following conditions: A) Status IS NOT Closed B) Tags CONTAIN NON OF THE FOLLOWING "dp-unread" (without the quotes).
  5. Add an Action and select the Read ticket field with a value of Checked.
  6. Click the Save button.
  7. Make sure your new trigger is at the bottom of the Active Trigger list.

Add Trigger to Update Read Column to Unread

Handling the Unread side is really pretty easy.  You just need to Clone the Trigger above, but change the Tags Condition to CONTAINS THE FOLLOWING and change the Read column value to Unchecked.  This will handle all new requests and whenever an agent responds to a ticket.

Adding Read Column to Views

Now all you need to do is click on the Views link under the Manage section, edit your View, drag the Read column where you would like it to be displayed and click the Submit button.  Repeat these steps on every view you would like this information displayed.

Back to Support